
Promotions
This module will help you to add promotional offers to specific products that you have listed on the portal.
Note: For access to Manage Promotions option under Seller’s Zone, one needs to be a registered seller on the portal.
1. Accessing Promotions –
There are two ways through which you can access Promotions as shown below-
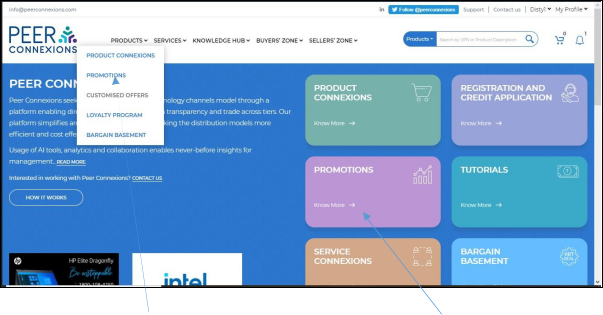
By clicking on the Promotions option under the Products drop down Promotions Tile or the as shown in the above image.
This will direct you to a new page as shown next.

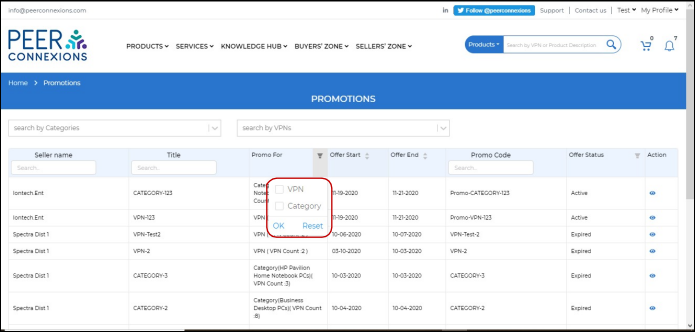
Here you can search for the required VPN (A) or also search VPNs by category (B) and their promotion offer status. (C)
You can also search VPN by Promo Code (D) as shown above.
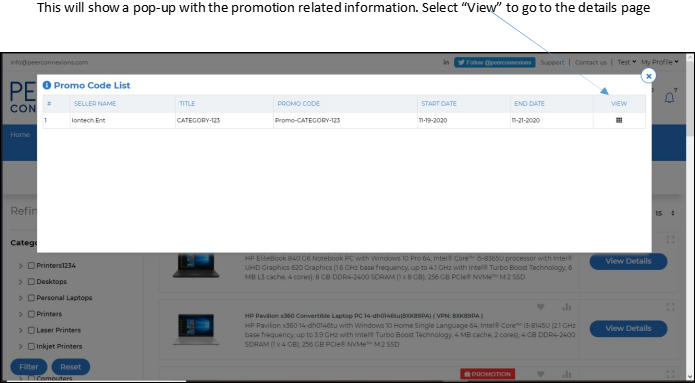
You can also click on the eye symbol in the action column (E), which will direct you to the promo details page as shown below-
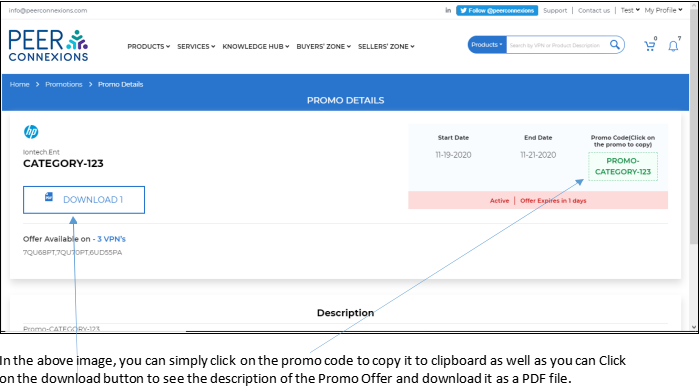
In the above image, you can simply click on the promo code to copy it to clipboard as well as you can Click on the download button to see the description of the Promo Offer and download it as a PDF file.
In the promotions page, you can also filter by Promo for VPN or Category as shown below
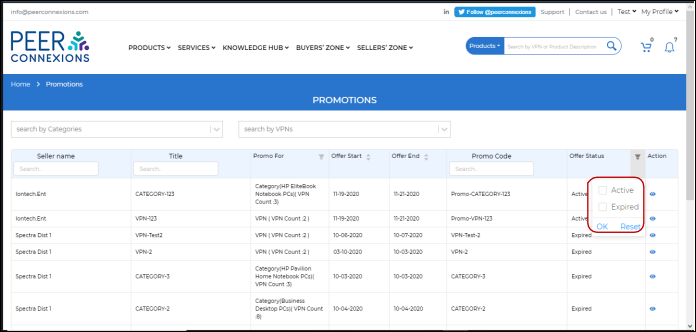
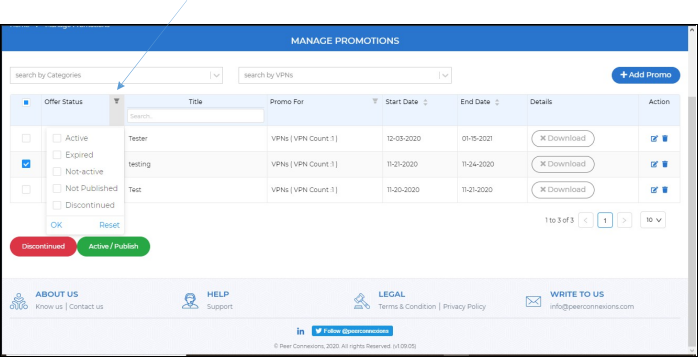
You can also Filter by the offer status, active or expired as highlighted in the below box
The Promotion can also be accessed through Product Connexions, by clicking on the promotion button of the desired product.


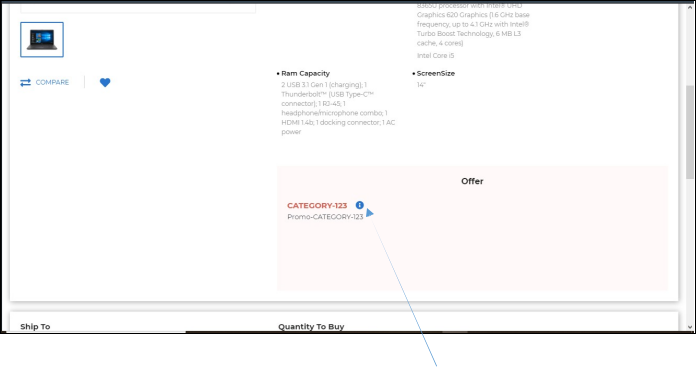
You can also go to the promotion details section by clicking on the ‘i’ symbol on the “Offer” section of the product details page as shown above.
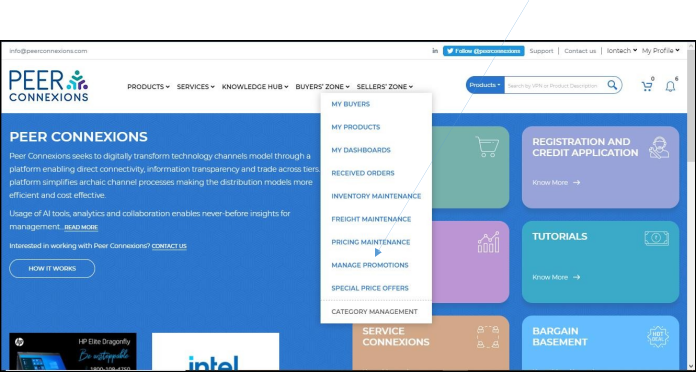
2. Manage Promotions: –
This section can be used by all those users who want to manage the Promotional Offers on the products they have listed for sales on the portal. It can be accessed from Seller’s Zone -> Manage Promotions as shown below-
Once you click on Manage Promotions, it will direct you to a new page as shown below-
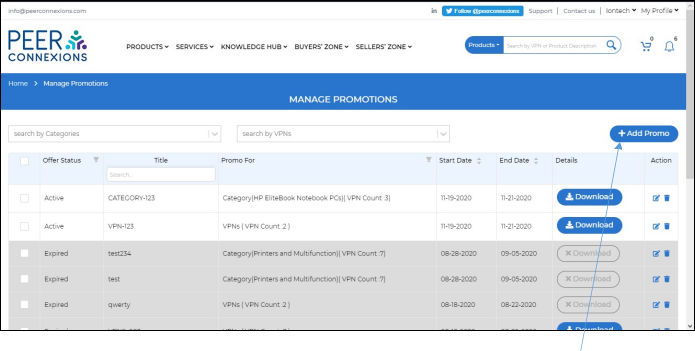
In this page, you can add Promotional offers on the applicable products by clicking on the “Add Promo” option.
Once you click on “Add Promo”, you will be directed to a new page as shown below-
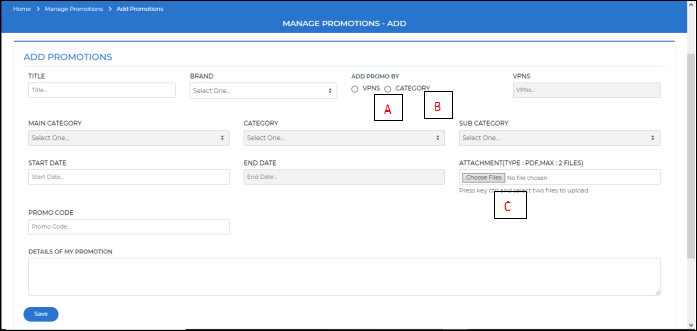
Here you can add the required promotional offer by VPN (A) or by Category (B) and also upload the PDF (C) for the promo and fill the required details and click on “Save”.
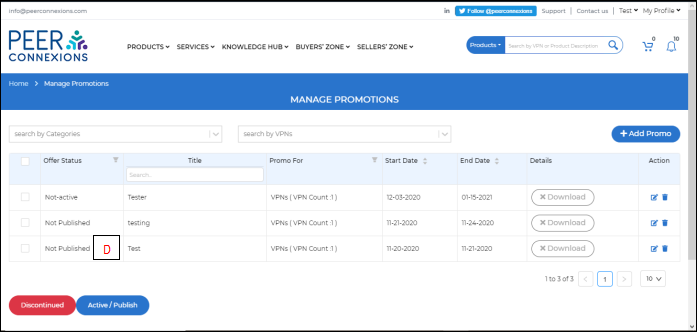
The Promo will now be saved and the status will be “Not Published” as shown below (D)
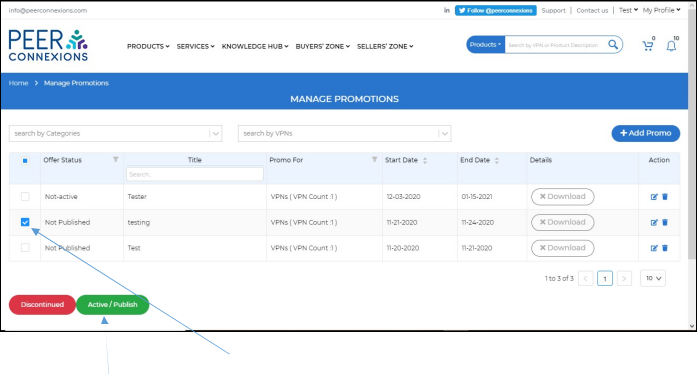
Select the required promo by checking the box in the first column of the respective promo and then click on “Active/Publish” button to activate the promo as shown above.
Note: If Promo is created for a future date, “Offer Status” will show as ‘Not active’ till the date is not reached. Status will automatically change to “Active” on the set promotion start date.
There can be multiple offer Statuses as Follows-
Active- This means that the promo is currently active on the portal.
Expired- This indicates that the promo has expired as its validity period has ended.
Not-Active-This indicates that the promo is currently not active and will get activated at a future date as set while creating the promo.
Not Published-This shows that the promo is created, but not yet activated or published.
Discontinued-This shows that the promo has been discontinued by the user who has created the promo.
Note: An “Associate” user can only create and discontinue a promo. They cannot activate or delete a promo.
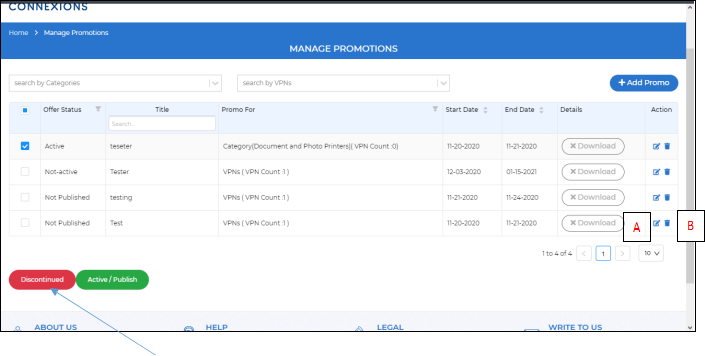
An active promo can be discontinued by selecting it and clicking on the “Discontinue” button as shown above.
You can also edit the promo but only when it is not in “Active” state by clicking on the Edit button (A) in the “Action” column. Also, you can delete the promo by clicking on the delete (B) button.
A promo which has expired, can be deleted by clicking on the delete button (C), no other changes can be made to an expired (D) promo as shown below.

You can also sort the promo by start date and end date by clicking on the toggle
“Promotions” as well as “Manage Promotions” section.
End of Document