
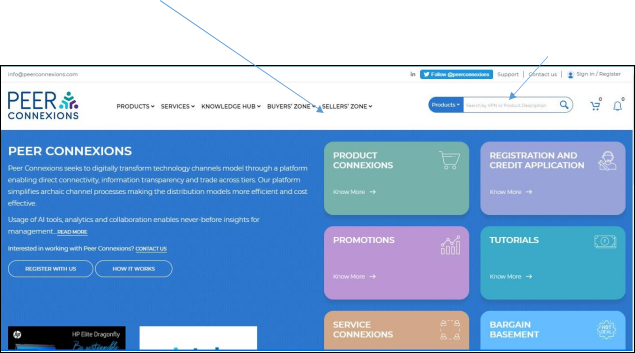
Placing an Order
You can place an order on Peer Connexions portal using the Product Connexions Option available on the homepage.
Step 1: Search for the required product:
Once you click on Buy Products option, you will be redirected to the Buy Products page where
you can select the required product available from the list.
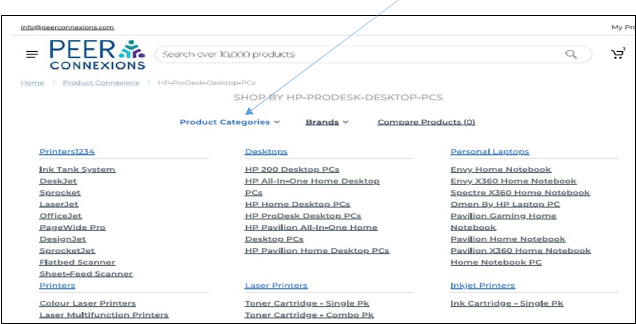
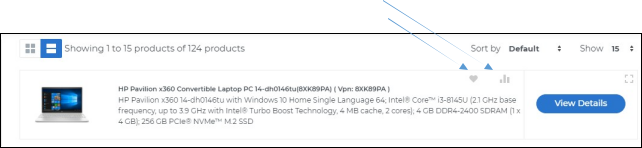
You can directly search for any product from the search box at the top right corner as seen below
You can search products from specific product categories using Product Categories option.
Products can also be searched by brands using Brands option.
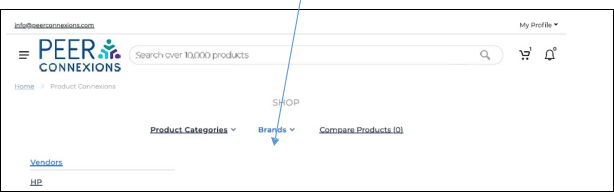
The ‘Compare Products (3)’ tab will show all the products that you have added to the compare list. The number within () is the product count that have been added for comparison.
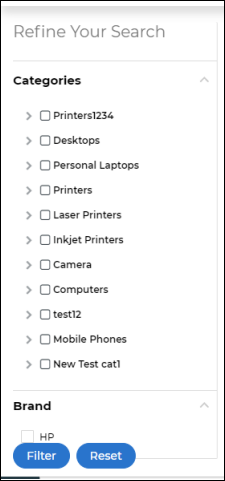
You can also refine your search using categories filter as shown above. This is available on the left side of the product connexions page.
Step 2. Compare Products if Required: –
If you want to compare any product, you can click on the chart icon on any product and add it to compare list. Also, you can make any product as ‘favorite’ by clicking on the heart icon.
Step 3.Check if a promotion is available of the product
You can see a green ribbon above the product as shown below if a promotion is available for the product-
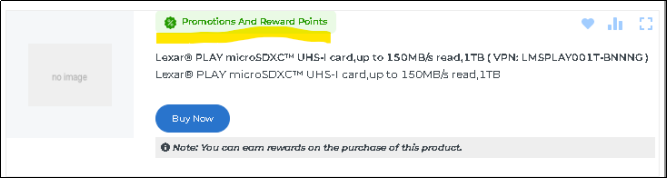
To see the details of the promotion, you can click on the green ribbon to see the details as below–
You can see the details about the type of Promotion(Online or Offline), the name of the seller which has added the promotion and if reward points are applicable on purchasing this product from the seller.
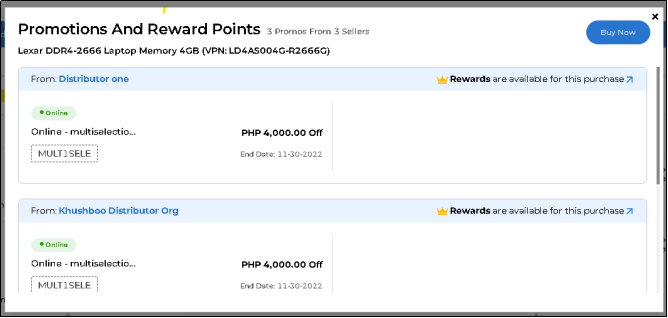
When you click on buy now button above, you will see the below screen which shows promotions on the product from different sellers—
Here all the available promos will show up.
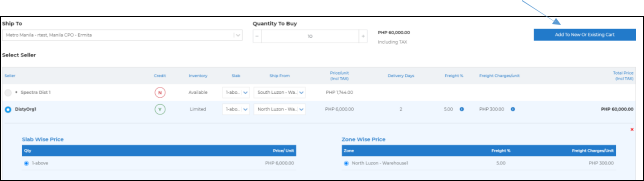
Step 4. Add the product to Cart:
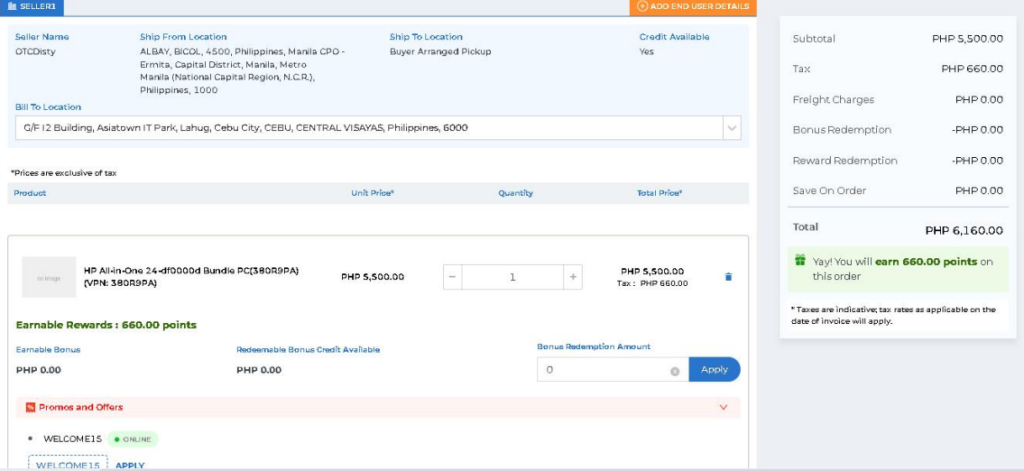
Once you click on any product, it will open a new page. Select the ‘Ship To’ address from the drop-down, select the seller and the quantity of the product and click on ‘Add to New or Existing Cart’ option.
A pop-up will be displayed prompting to either create a new cart or to add to an existing one as shown below.
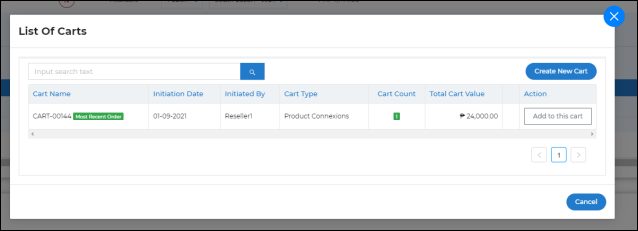
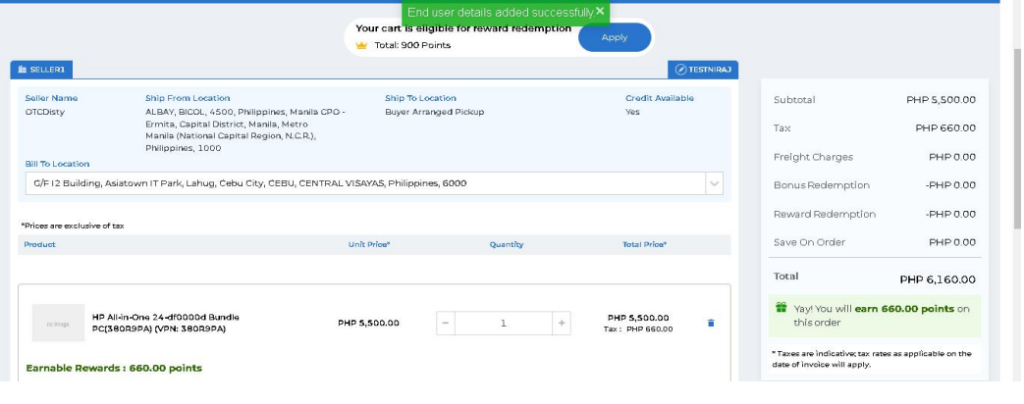
You can choose from one of your existing carts or create a new one using ‘Create New Cart’ button. You will be taken to the Order Preview page as shown below.
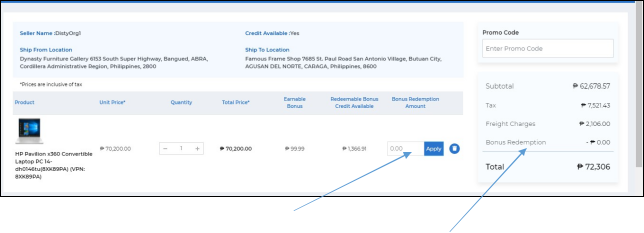
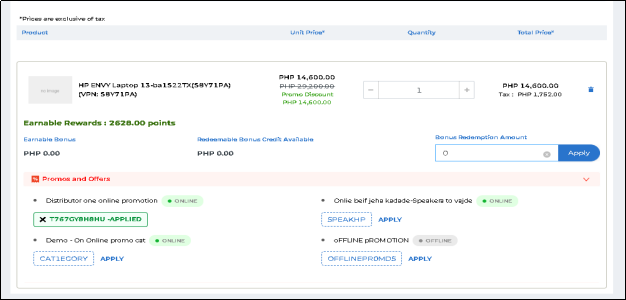
On this page, you can apply a ‘Bonus Redemption Amount’. This amount is the amount that will be deducted from ‘Redeemable Bonus Credit Available’ and will be added as a ‘Bonus Redemption’ to your order.
The required promo can be applied on the cart page as shown below—-
Step 5. Submit the Order: –
If you have chosen a ‘Ship To’ location then you can either directly submit your order or add instructions for the seller and then submit.
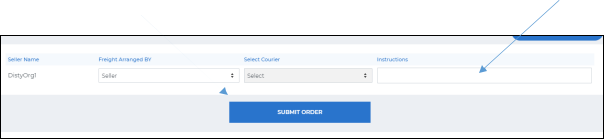
If you choose to pick-up the consignment and would like to use a freight forwarder then choose from a freight forwarder that you would have already added (seen here) or add one using ‘My Freight Forwarder List’ before you submit the order.
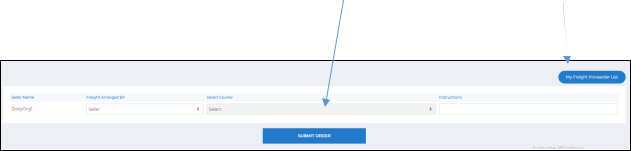
You can also leave the ‘Select Courier’ blank and add appropriate instructions, if any, for the seller.
Note:- If a product is set to ask for End User details, please follow the below flow after adding the product to cart—
- Click on the Add End User Details button for the VPN.
2. You will be redirected to the following page—
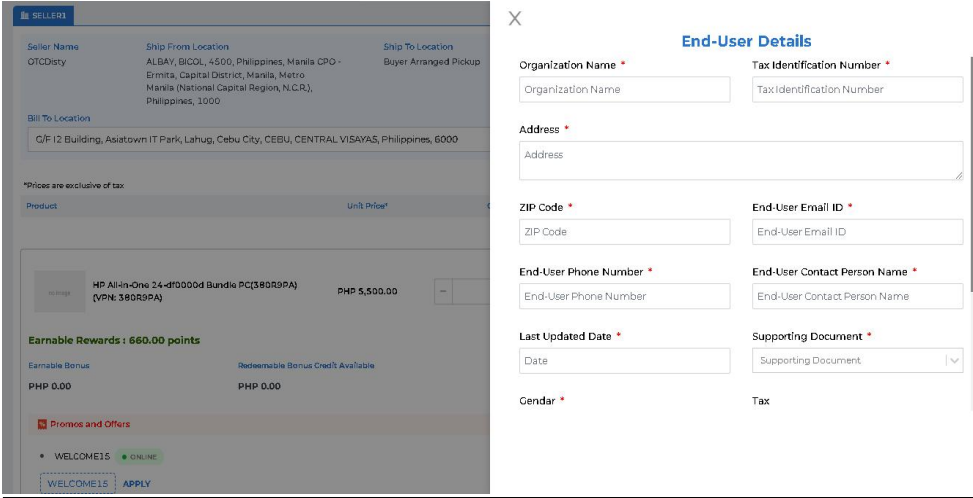

3. Here you need to enter all the required end user details and submit them. Unless the end user details are submitted, you will not be able to place the order.
4. After submitting the details, you will be able to see a message as below and will be able to edit the details if required by clicking on the edit button besides the end user section.
5. You can now proceed with Placing the order using the submit button at the bottom.
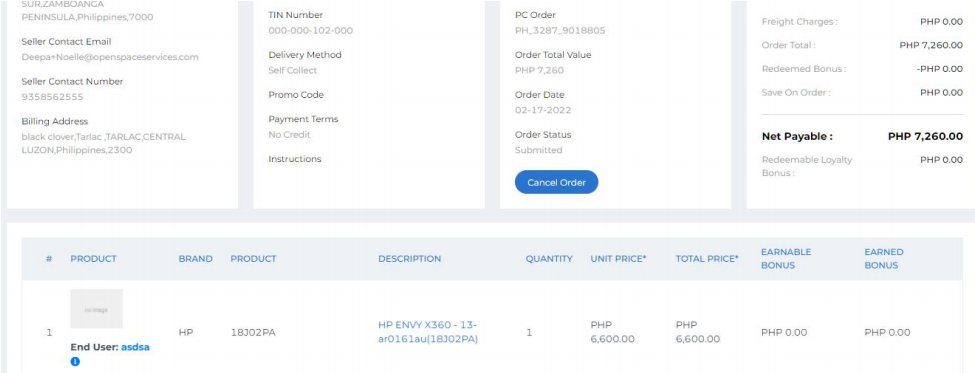
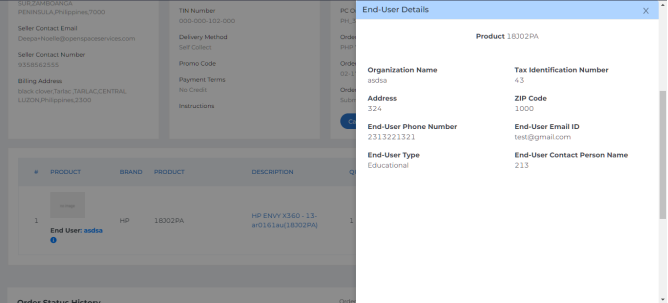
6. After placing the order,you can also view the end user details from the order email>End User details button which will redirect you to the order detail page as below-
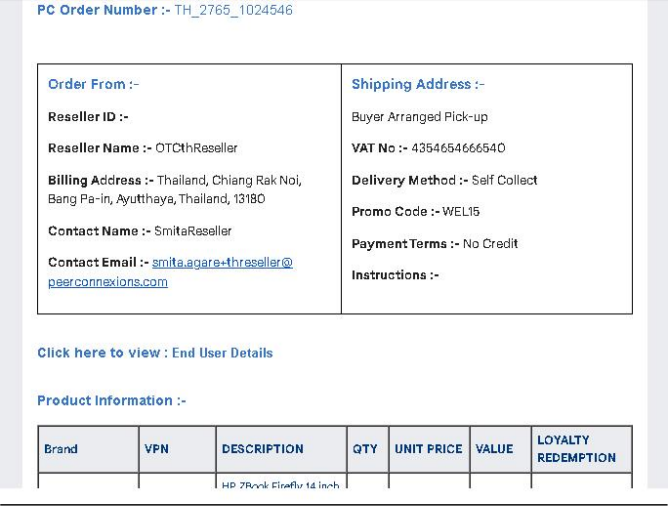
Upon clicking on End User details, you will be able to see them as below-
PLACING AN ORDER FOR AN OVERSEAS SELLER
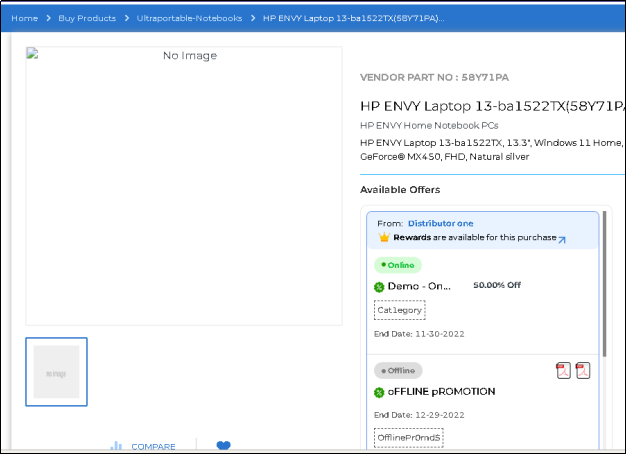
As described above, you can search for the required product and when you click on view details of the product and scroll down, you will see the product sellers with their pricing for the product as below.
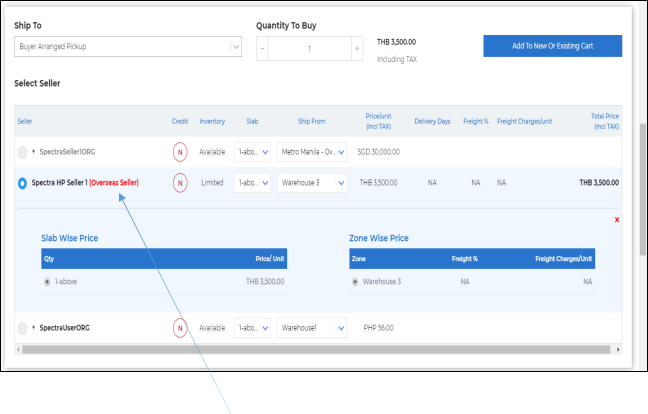
If the product is being sold by an overseas seller then the seller is marked as an ‘Overseas Seller’.
Once you add the required product to the cart, you will be directed to a page as shown below
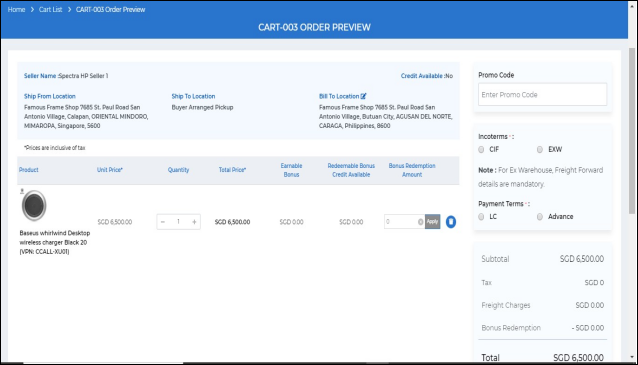
The difference between domestic and import orders is that for import orders you will have to provide additional information like ‘Incoterms’ and the ‘Payment Terms’ before submitting the order as can be seen in above screen shot.
If you select the Incoterms as Ex Warehouse, then you will have to add freight forwarder details to proceed, if you select Incoterms as CIF, then you will have to add clearing agent details to proceed.
Now, as you can see below in the red pop-up message box at the top of the page, you cannot generate a purchase order until a courier (Freight Forwarder/Clearing Agent) is selected.
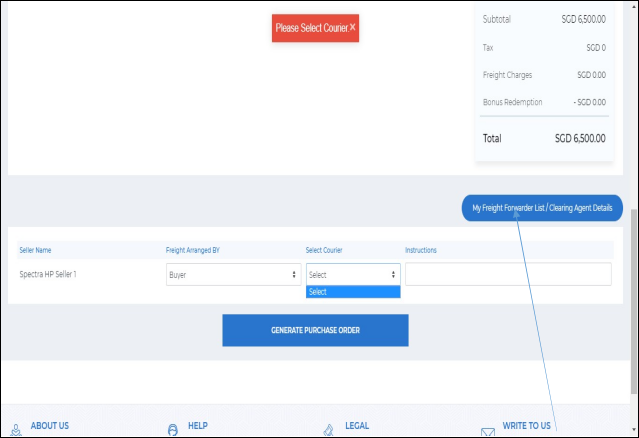
You can add the Freight Forwarder List/Clearing Agent details by clicking on the designated button.
You will be directed to a new page as shown below
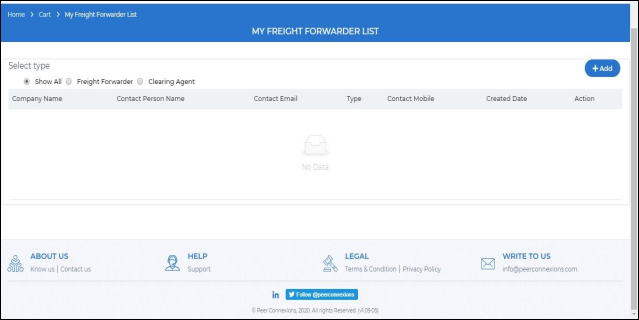
Here you can click on the ‘Add’ button which will open a new pop up as shown below-
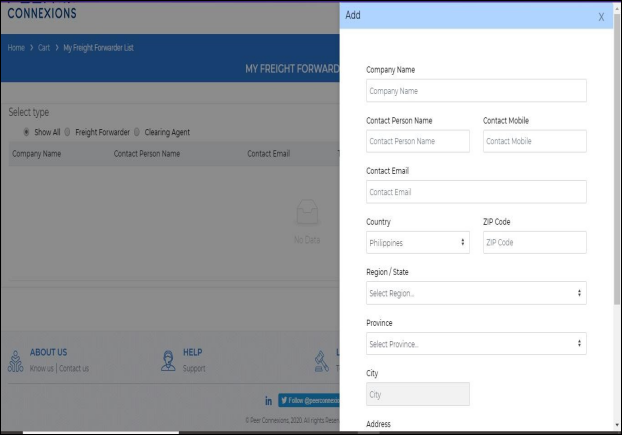
Here you can fill in all the details and scroll down as shown below-
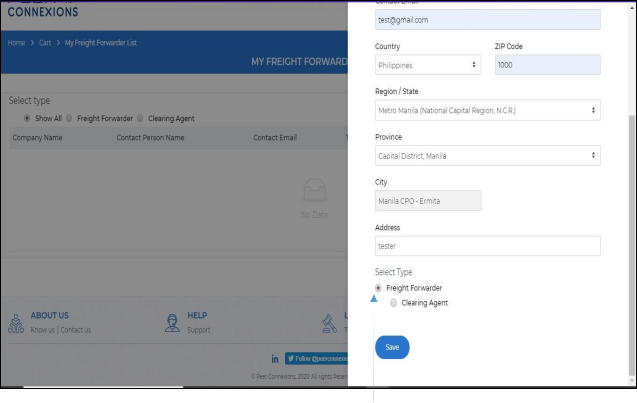
After adding all details, you have to select if you are adding a Freight Forwarder or Clearing Agent using the radio button and click on save.
Note: If you have selected country as Philippines, the portal will allow you to add a contact number starting with +63 only, for other country contact number, you need to set the country accordingly.
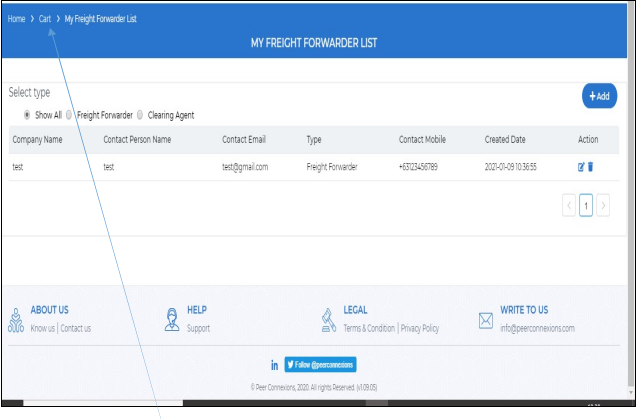
Once the freight forwarder is added, you can view the details as below-
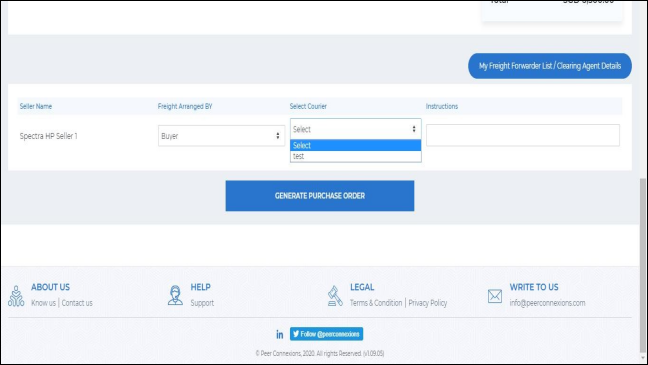
Now, you can click on the cart option above to go back to your cart and select incoterms and payment terms again and select the freight forwarder from the drop down as shown below-
Now, you can click ‘Generate Purchase Order’, this will direct you to a new page as shown below-
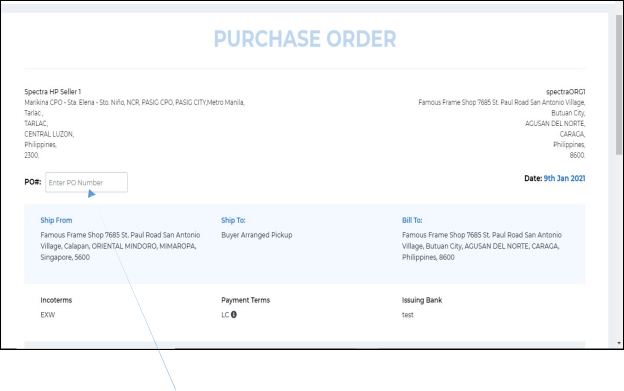
Here you need to add the PO number in the box provided, and after that you can scroll down which will show a screen as shown below
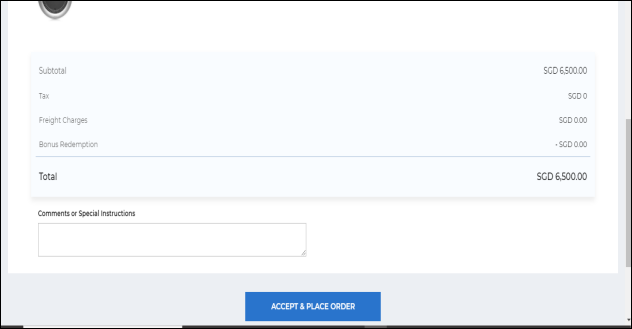
Here if you want, you can add the required comments or directly click on ‘Accept and Place’ order.
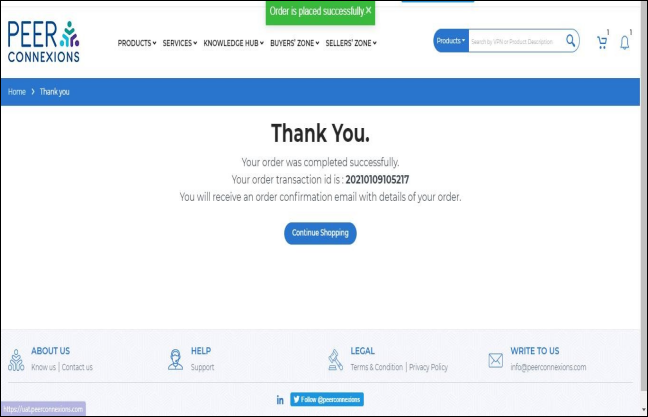
On doing so, you will be directed to a new page as shown below-
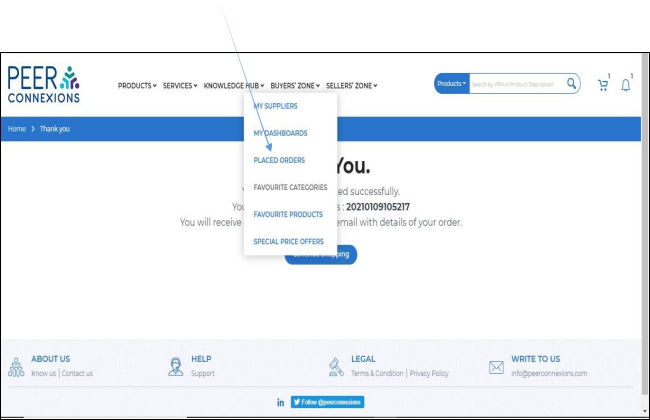
Now, go to Buyers’ Zone -> Placed orders to see the status of the order you placed.
You will see that the order is in ‘Submitted’ state as shown below-
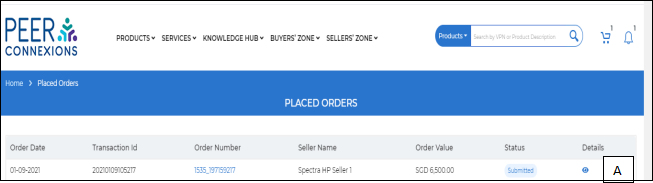
You can click on the eye symbol (A) to view the order details as shown below-
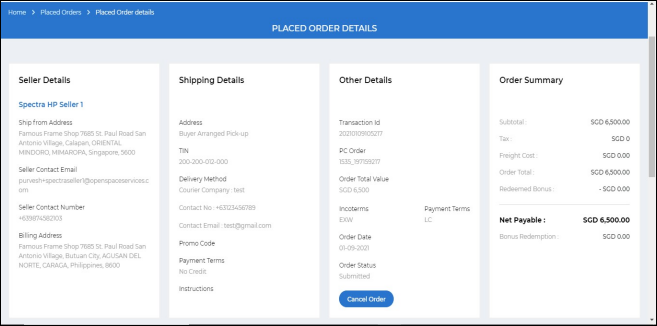
Here, you can also cancel the order if you wish by clicking the ‘Cancel Order’ button.
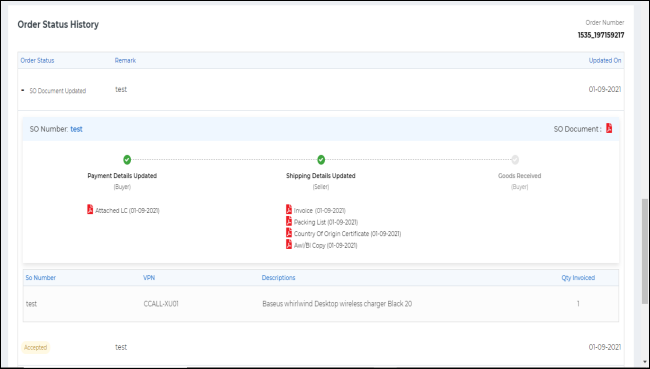
You can scroll down to view the ‘Order Status History’ as shown below
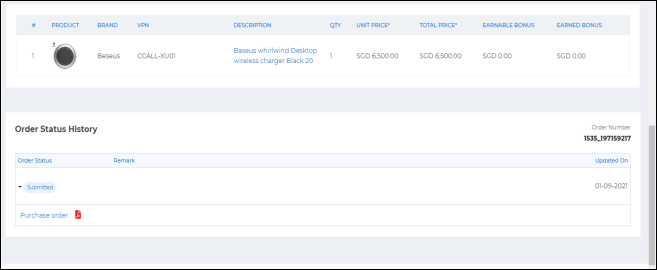
You will see that the order is still in ‘Submitted’ state. You will have to wait for the seller to ‘accept’ the order. Once the seller accepts the order, you will see the order status history as below-
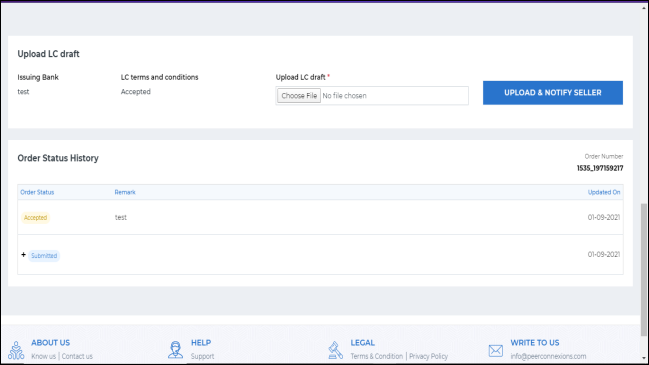
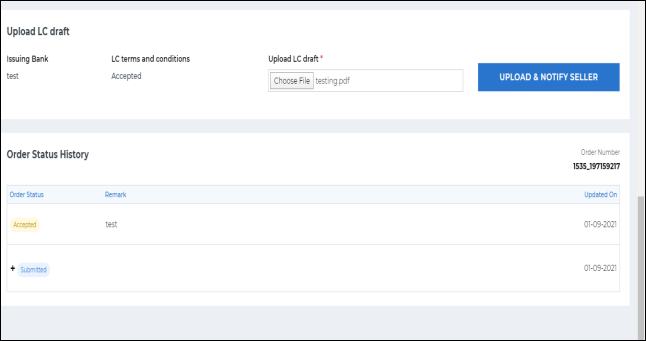
Now, you need to upload the LC draft as payment terms selected was ‘LC’ while placing the order. Click on ‘Upload and Notify Seller’ as shown below-
Once you upload the LC draft, you will see the message as shown below-
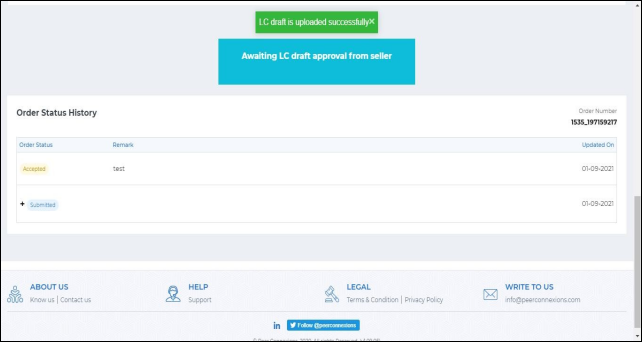
Now, you have to wait for the seller to ‘Accept the LC draft and generate the SO number’ from their side. Once the SO number is generated, the order status will change as shown below-
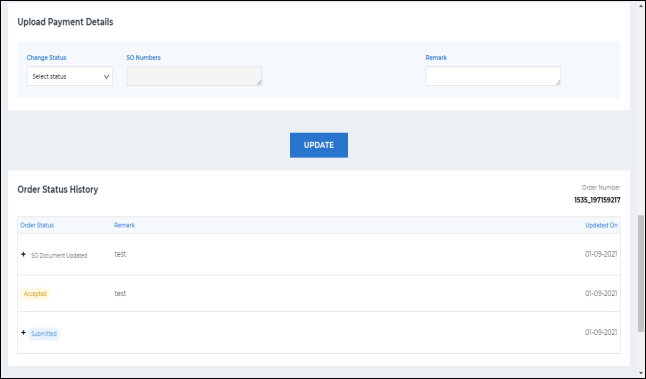
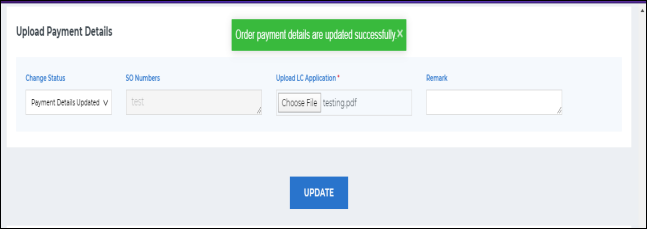
Now, you will have to upload the payment details by changing the order status to ‘Payment Details Updated’ from the drop down as shown below-
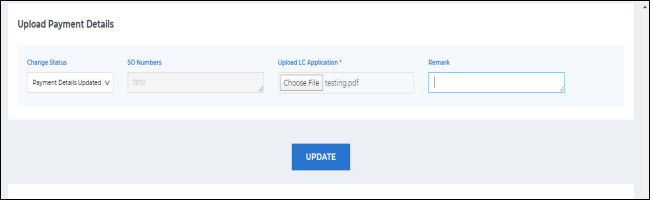
Once you upload the document and click on ‘Update’, you will get a message as shown below-
Now you will have to wait for the Seller to update the shipping details, once the seller updates it, you will be able to see the same in the order status history as shown below-
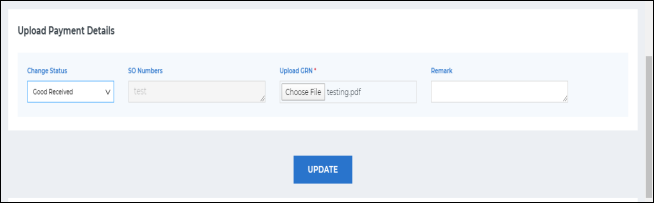
Now, once you receive the goods, you will have to update the order status as ‘Goods Received’ as shown below by uploading the GRN document-
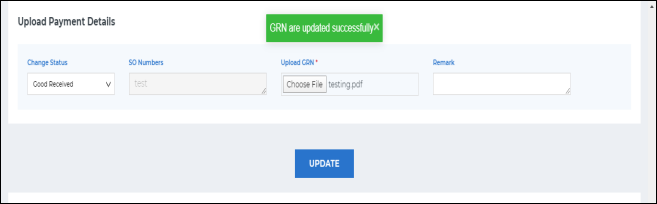
You will get the below message once you click on ‘Update’
The order process is now complete and accordingly updated on the portal.
-End of Document