
Export Order Process
This tutorial will elaborate the steps to add new products to the portal and to process orders placed on the portal.
Steps for adding a New VPN
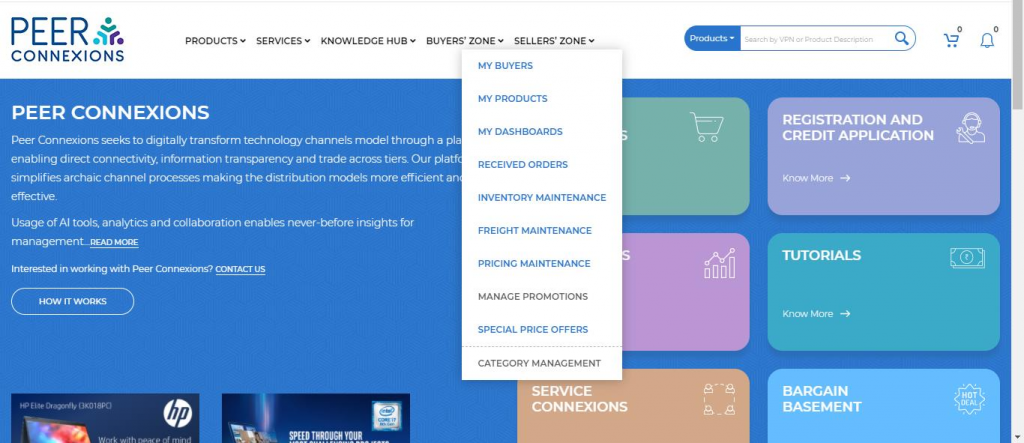
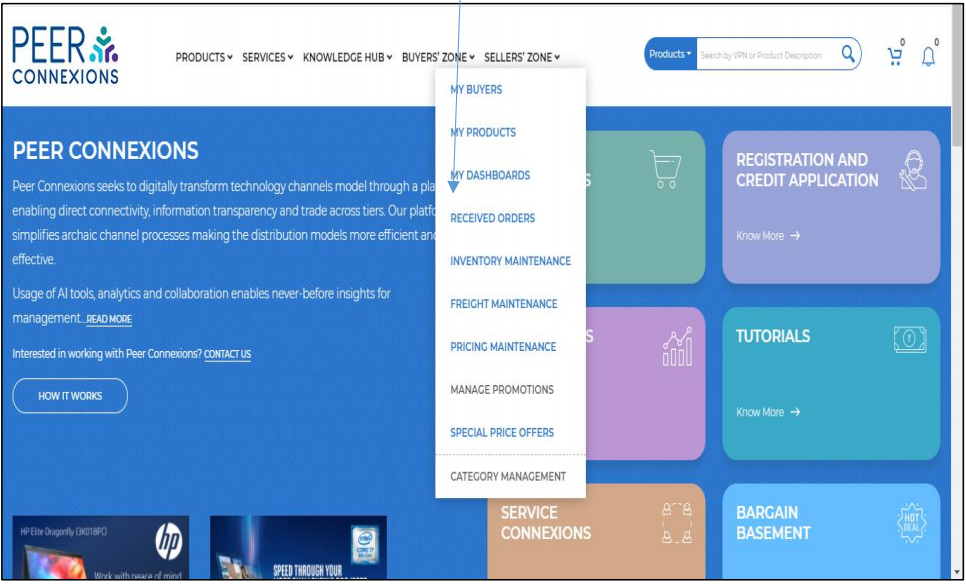
You can add a new product from the homepage by going to Sellers’ Zone -> My Products as shown below-

This will direct you to a new page as shown below-

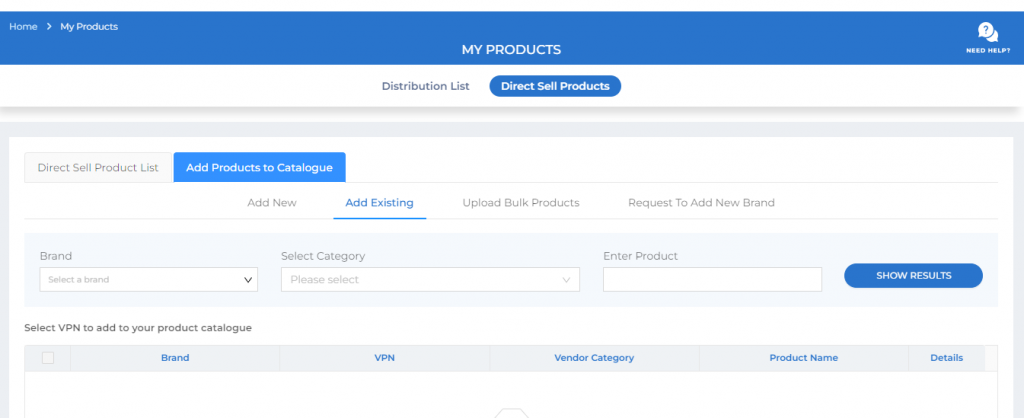
Now, go to the ‘Direct Sell Product’ and then ‘Add Products to The Catalogue’ tab which will open a new page as shown below-
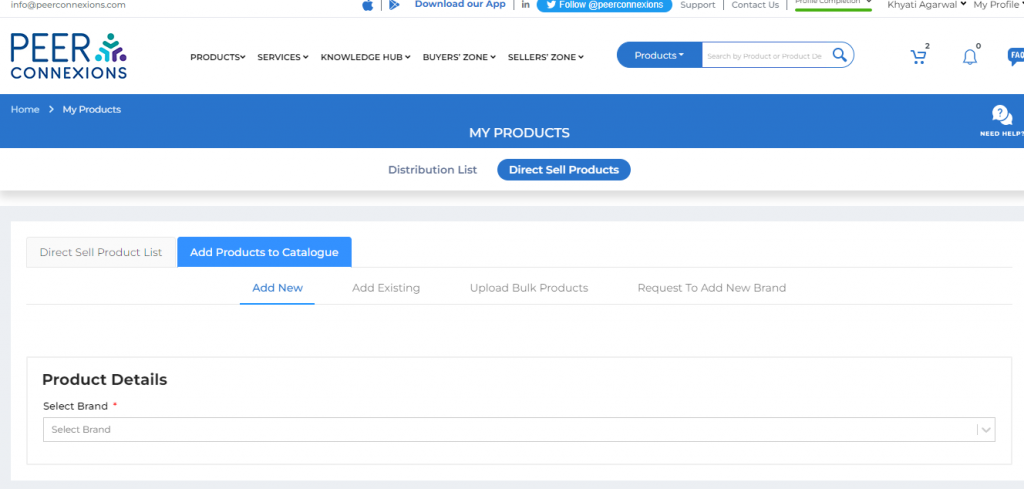
Here you can add a new product using these options-
1.Add New
2.Add Existing
3.Upload Bulk Products
4.Request to Add New Brand
To add a new product which is not available on the portal, you can add the product using the ‘Add New’ tab as indicated in the above screen shot.
Here, you need to select the Brand first, And then you will be able to select the Category and add the required VPN along with related details as shown below-
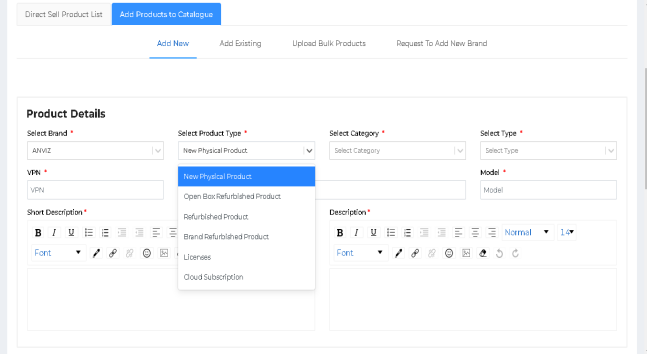
Note: All the inputs marked with an asterisk are mandatory in order to proceed.
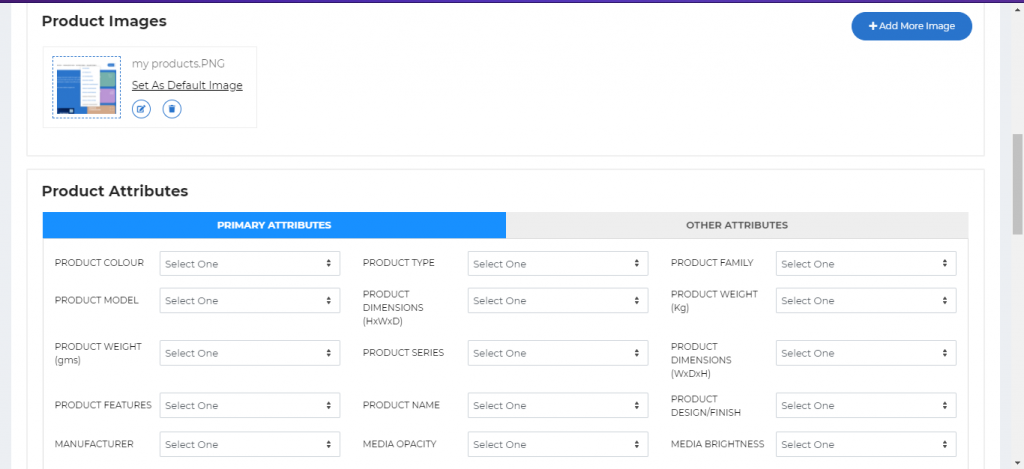
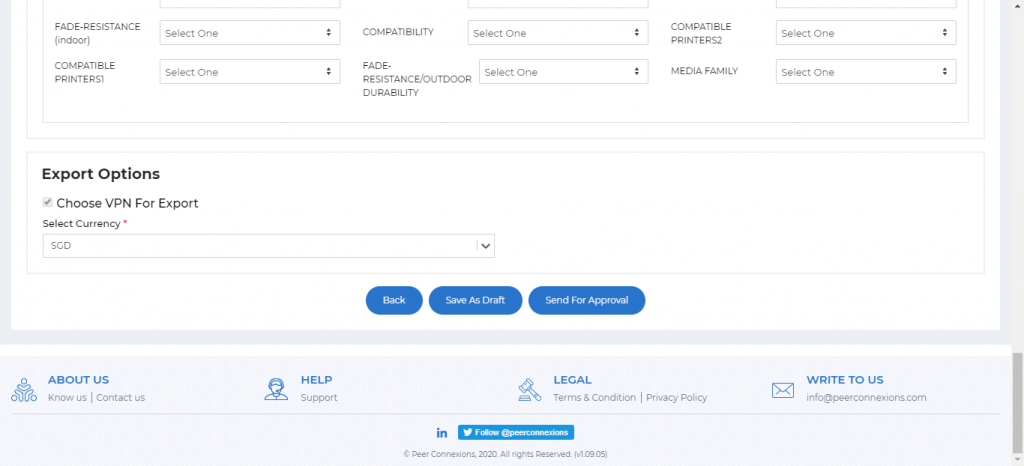
On scrolling down, you will see the ‘Product Images’ section where you can add the required product image and in the ‘Product Attributes’ section, you can select the required attributes for the product.
On scrolling down further, you will see the option to select the currency in which you want to sell the VPN
as below-
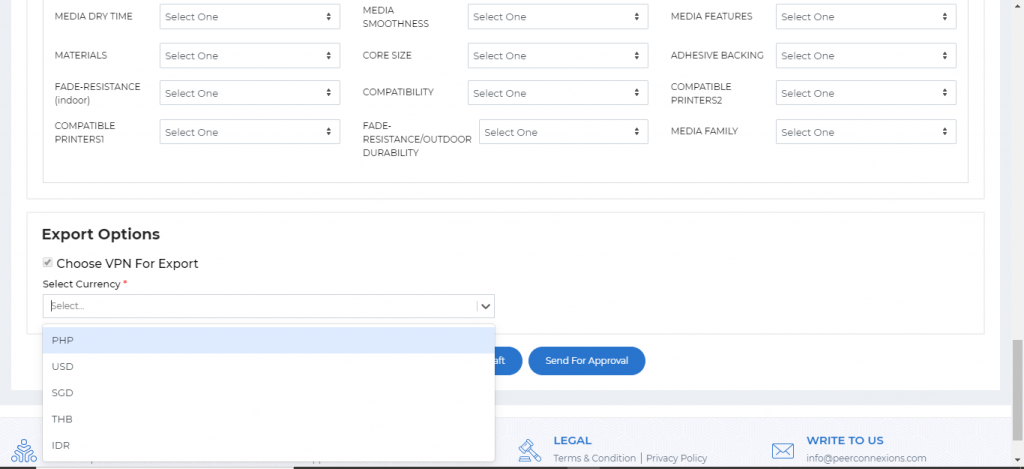
Now you can either send this VPN for approval to Peerconnexions using ‘Send for Approval’ or you can save this VPN as draft for future updates using ‘Save as Draft’ as shown in below screen shot.
Once you send for approval, you will get a confirmation pop up as below-
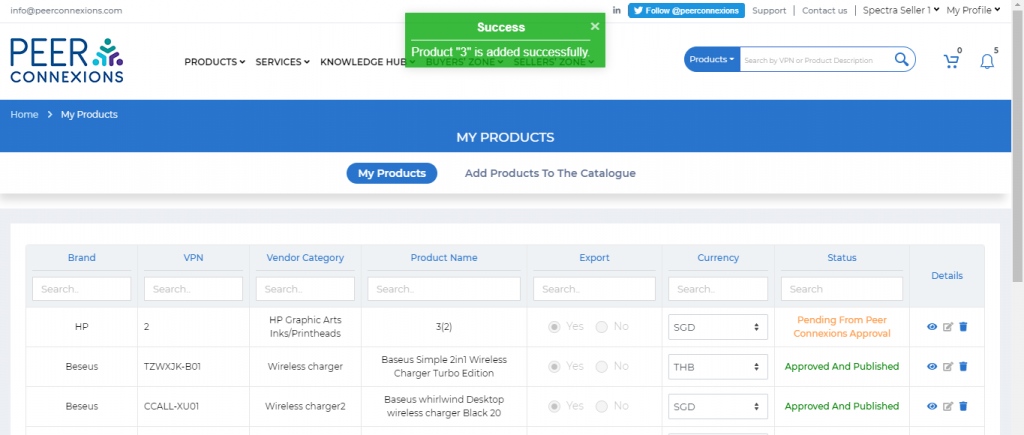
The status of the VPN will be ‘Pending from Peer Connexions Approval’
Once Peerconnexions approves this product, it will be available to buy on the portal and the status will
change to ‘Approved and Published’.
Steps for adding an existing VPN
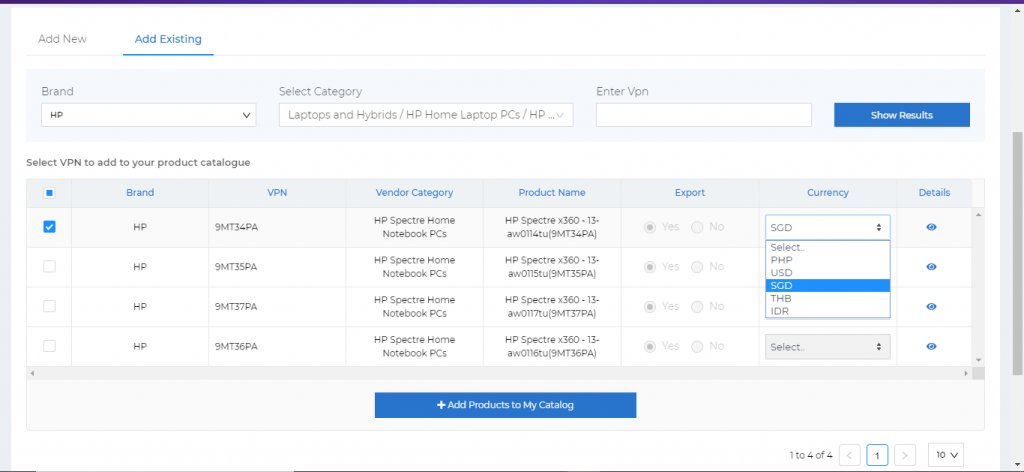
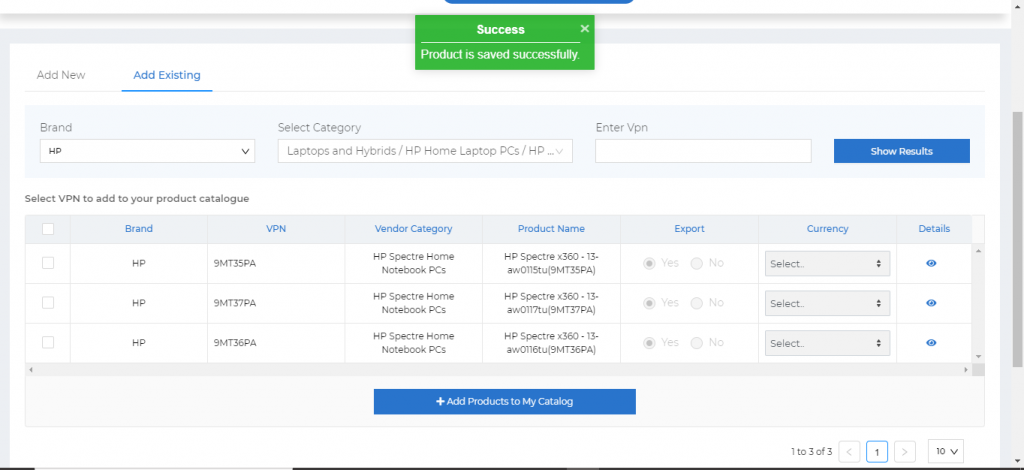
If you want to add an existing VPN to your catalogue, you can go to ‘Add Existing’ tab and select the Brand, Category, product and click on ‘Show Results’ as shown below-
Now, you can select the required product by using the check box on the left and select the currency as
shown below-
Once you click on ‘Add Products to My Catalog’, you will get the message that the product is saved
successfully as shown below-
This product will now be listed under ‘My Products’.
Note: All newly added products should have the ‘Inventory’ and ‘Pricing’ set in the portal for a buyer to be
able to view and order them.
Steps to upload the VPN Pricing and the Inventory
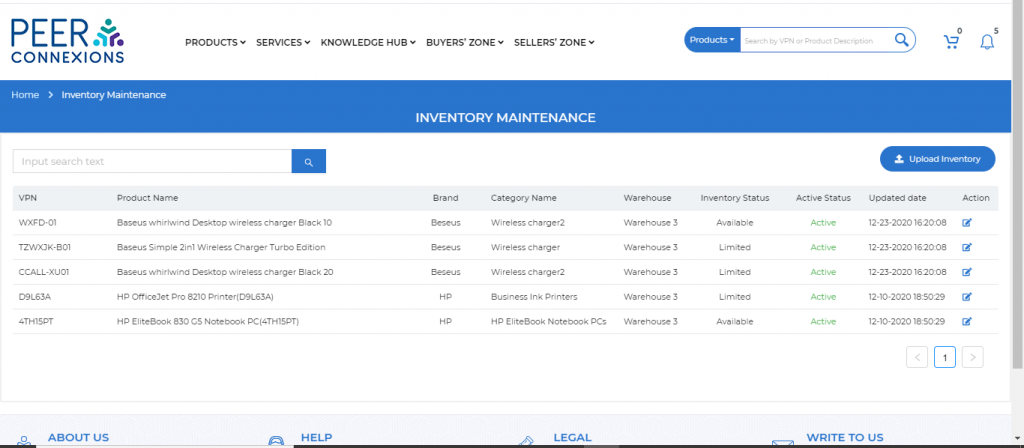
You can access the Inventory Maintenance section by going to Sellers’ Zone -> Inventory Maintenance as
shown below-

This will direct you to a new page as shown below-
Here click on ‘Upload Inventory’ which will direct you to a new page as shown below-
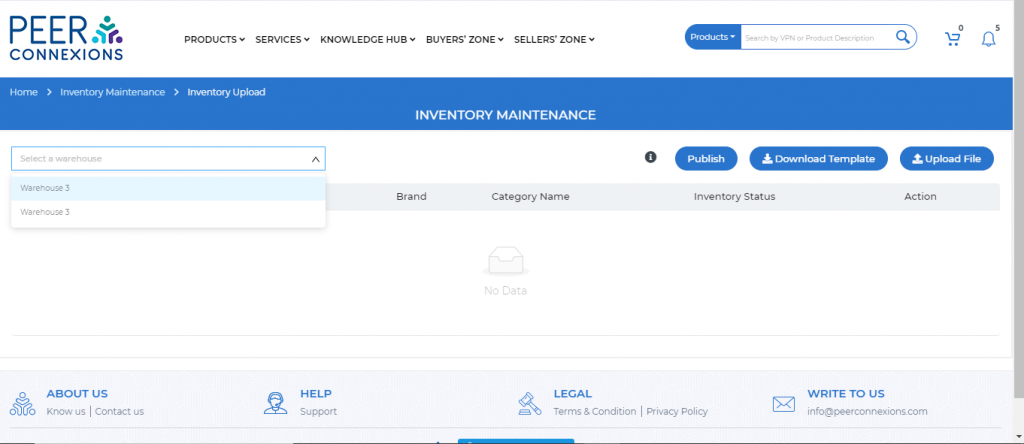
Here you need to select the warehouse for which you want to upload the inventory.
Click on the ‘Download Template’ option which will download an excel file as shown below-

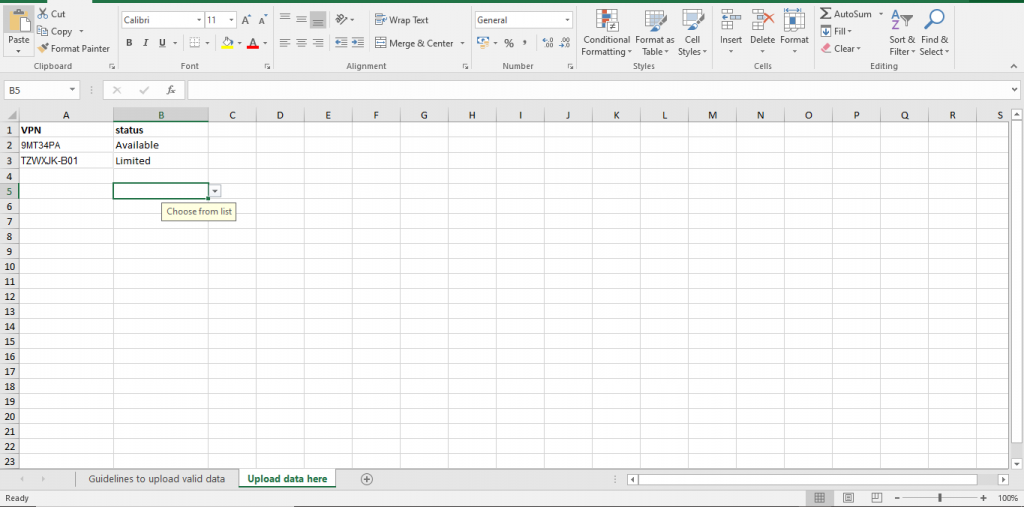
Here you can go to the ‘Guidelines to Upload Valid data’ sheet to see the guidelines to upload the VPNs
which can also be viewed if you hover over the (i) symbol as shown below-

Add the VPNs for which you want to upload the inventory from ‘My Products’ along with the status.
Note: Current inventory status options are 1. Limited 2. Available and 3. Nil.
Once you fill in the details as shown below, you have to save the excel file and click on ‘Upload File’
After the template upload, the inventory details are listed as shown below-
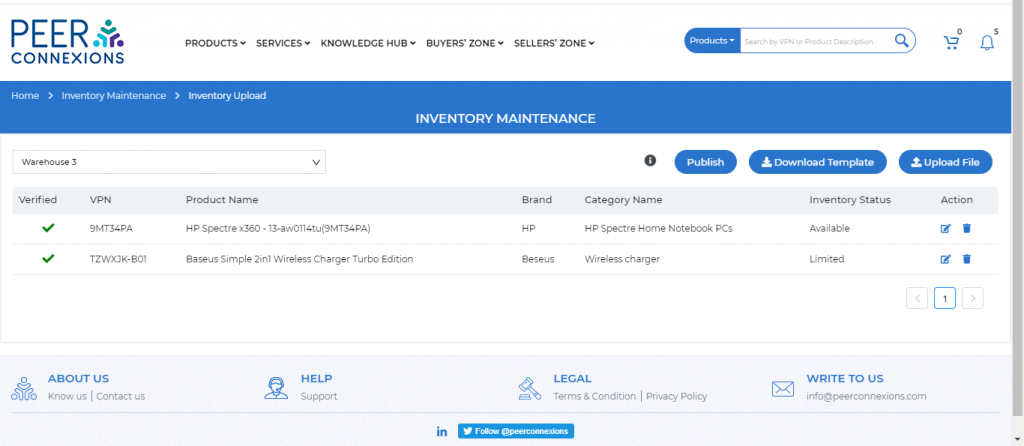
Now click on ‘Publish’ to save and publish this inventory on the portal.
Similarly, you can access the Pricing Maintenance section from the homepage -> Sellers’ Zone as shown
below-
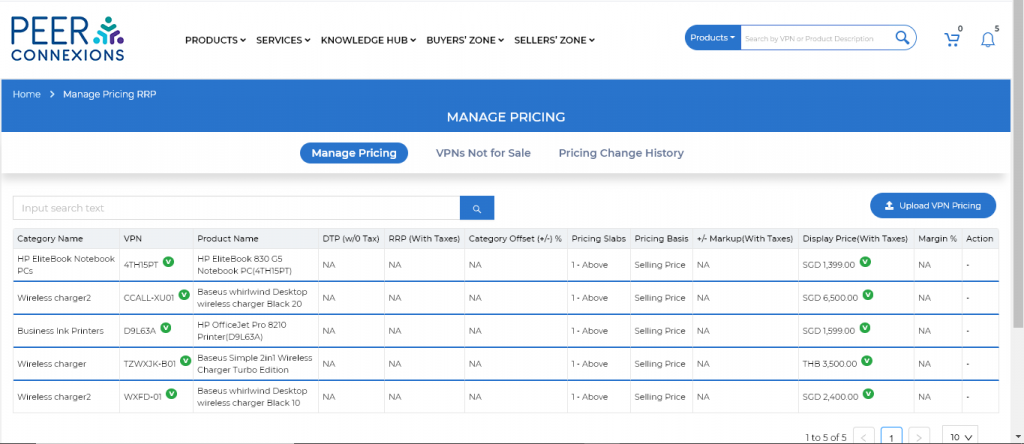
You will be directed to a new page as shown below-
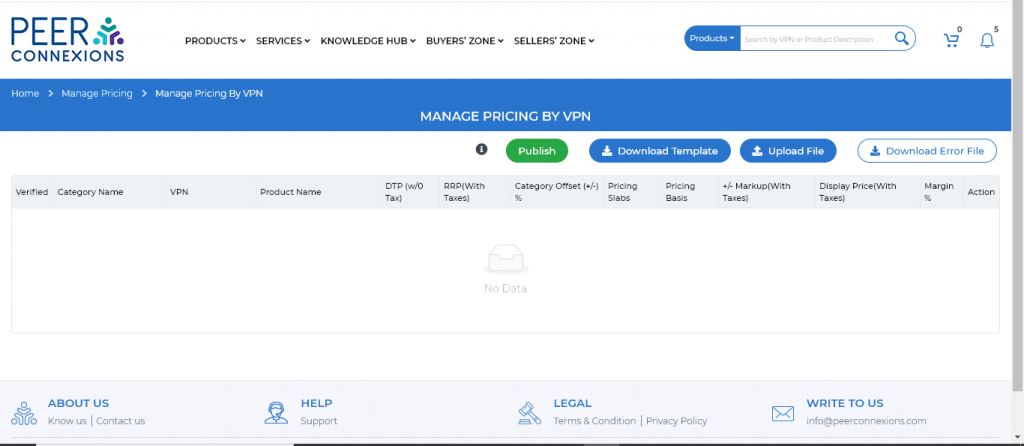
Here click on ‘Upload VPN Pricing’ which will direct you to a new page as shown below-
Choose ‘Download the Template’ which will download an excel file as shown below-
Similar to the inventory excel template, here too you can take the help of the guidelines provided in the
‘Guidelines to upload valid data’ sheet and accordingly fill-in the pricing information.
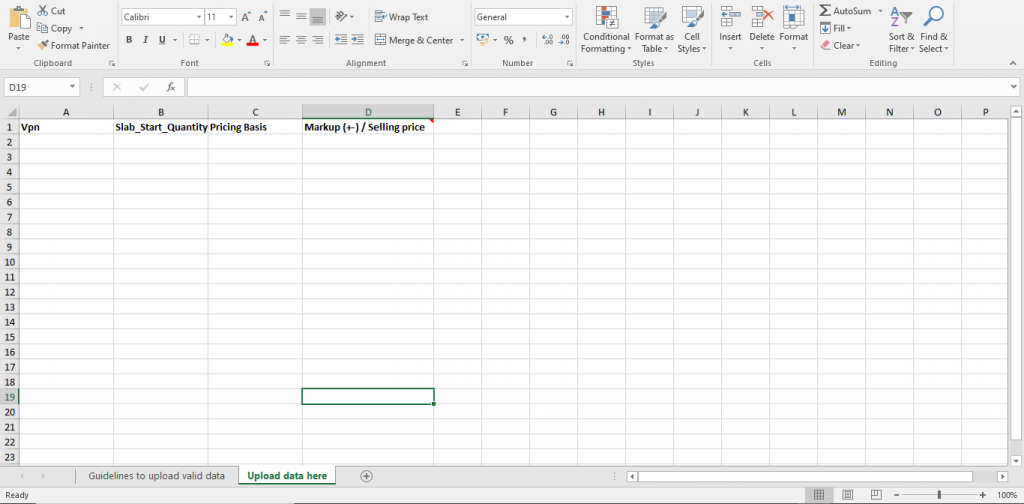
Do the below to set the pricing details VPN-wise
1. In the excel, add the VPNs under the VPN column for which you wish to upload the pricing
2. Next set the Slab_Start_Quantity to 1
3. Choose ‘Pricing Basis’ as Selling Price
4. Set the required selling price for the VPN in the column ‘Markup(+-) / Selling price’
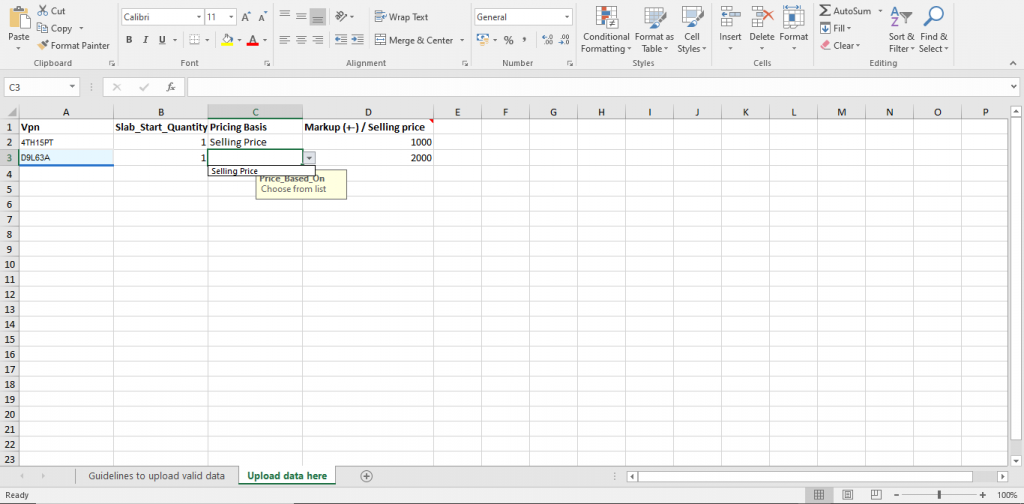
Save and upload the template and you can see the uploaded pricing details as shown below-
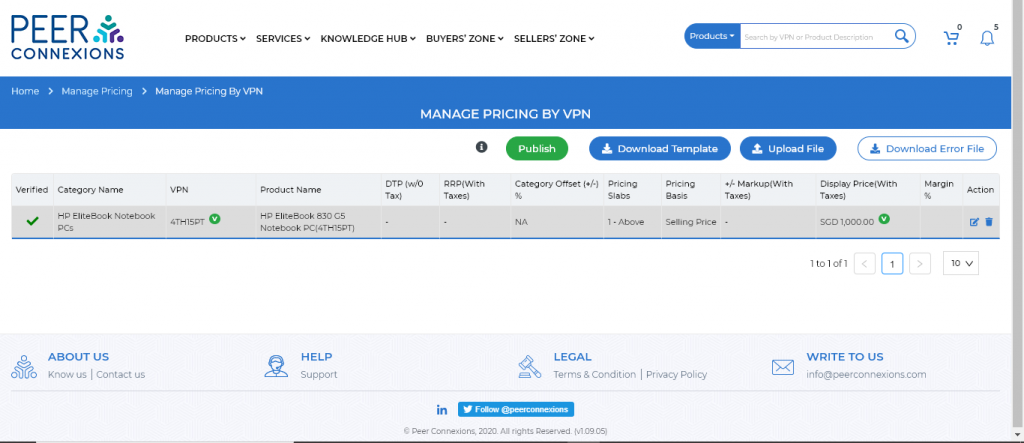
Click on ‘Publish’ to save and publish the pricing of the uploaded VPNs to the portal.
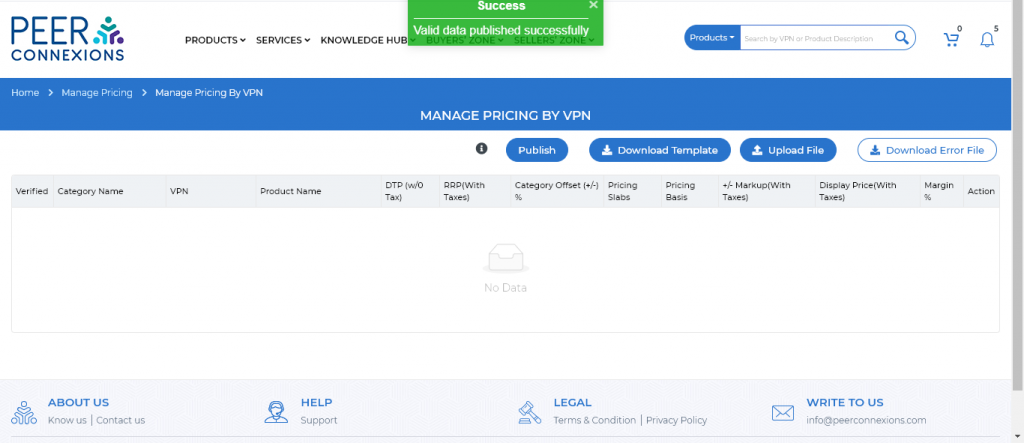
On successful publish, you will get a message as shown below in a green pop-up box.
For the VPN’s that have failed the verification (first column ‘Verified’ will have an ‘X’), you can rectify
them by downloading the ‘Download Error File’ and uploading it with the corrected information.
Error message can be viewed by hovering over the ‘X’ symbol.
Order Processing Guide
All received orders can be accessed from the received orders section on the homepage as shown below-
You will be directed to a new page once you click on ‘Received Orders’ as shown below-
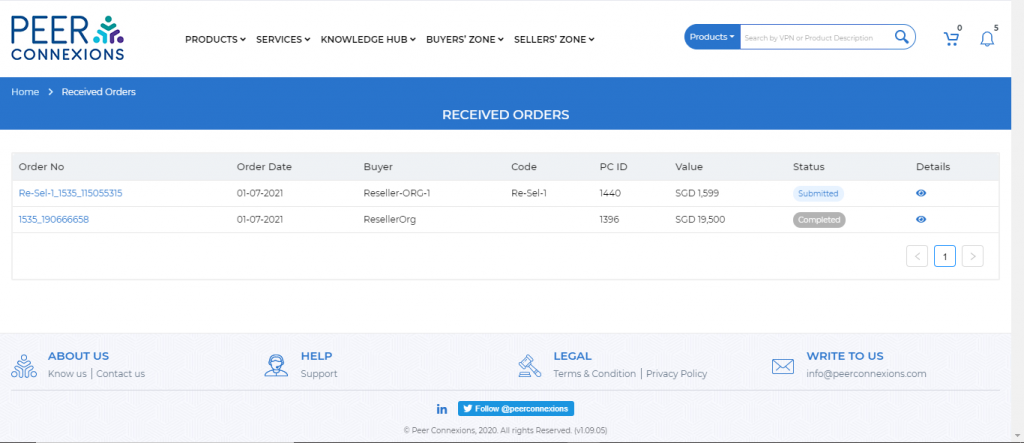
Note: All the orders that you receive will be in the ‘Submitted’ state.
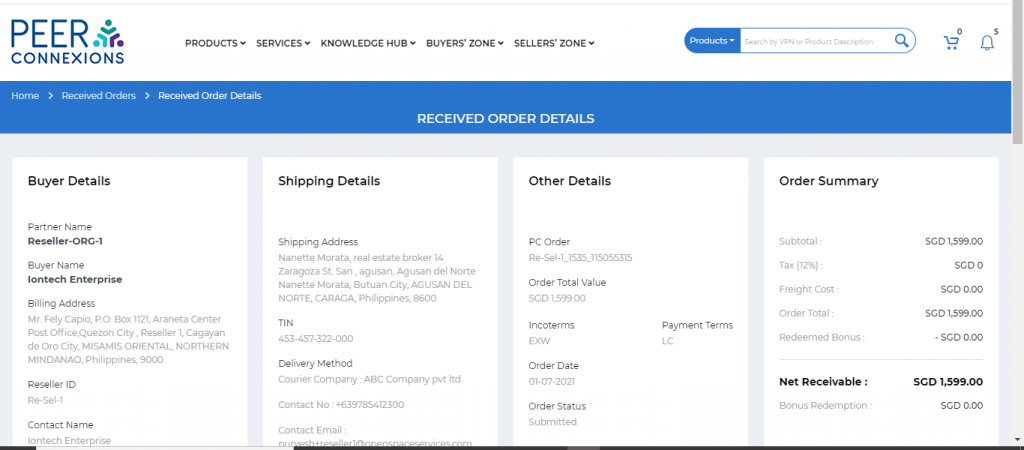
You can view the details of an order by clicking on the eye symbol which will open a new page as below-
On the same page scroll down to update the order status

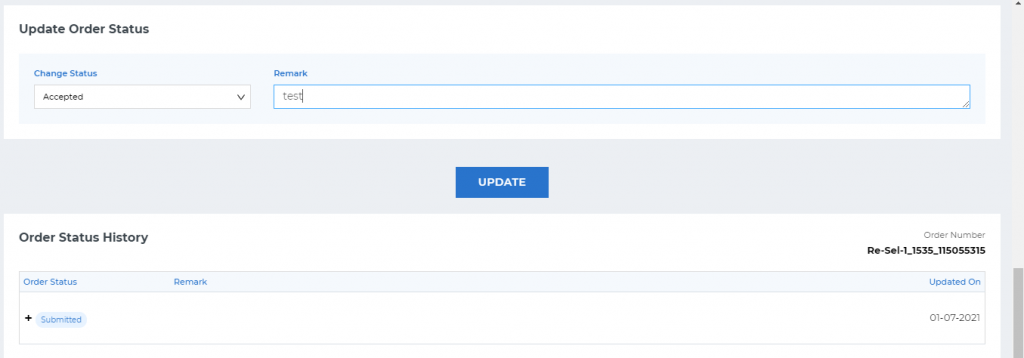
All orders need to be accepted first in order to proceed further. You can do this by selecting the ‘Accepted’ status and clicking on the ‘Update’ button as seen above.
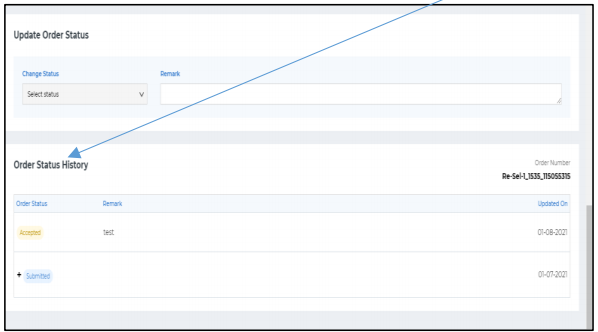
The order status changes to ‘Accepted’ as viewed under ‘Order History’ section, as can be seen from the
below screen shot.
Once an order is accepted, the ‘Select Status’ is disabled which means thar you have to wait for the buyer
to upload the LC draft to make any further updates to the order status.
Once the buyer uploads the LC draft it can be viewed on the same page as shown below-
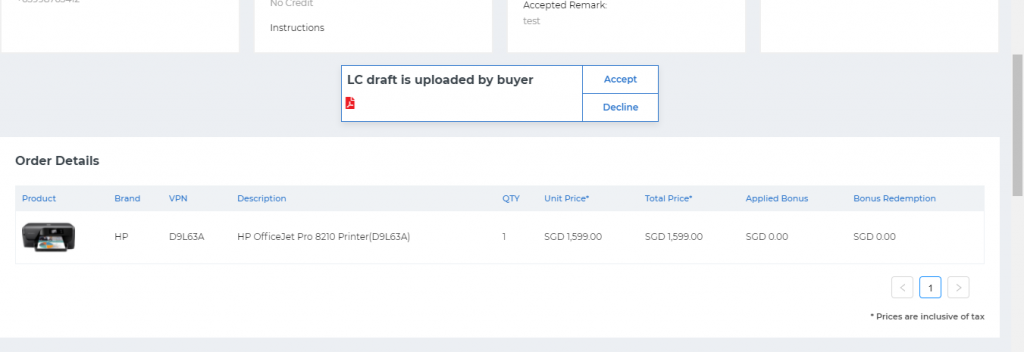
You can view the draft by clicking on the PDF symbol and can ‘Accept’ or ‘Decline’ the draft.
Note: If LC draft is declined by you then you need to wait for the updated LC from the buyer before
proceeding further.
Once LC draft is accepted, you can change the order status as shown below-
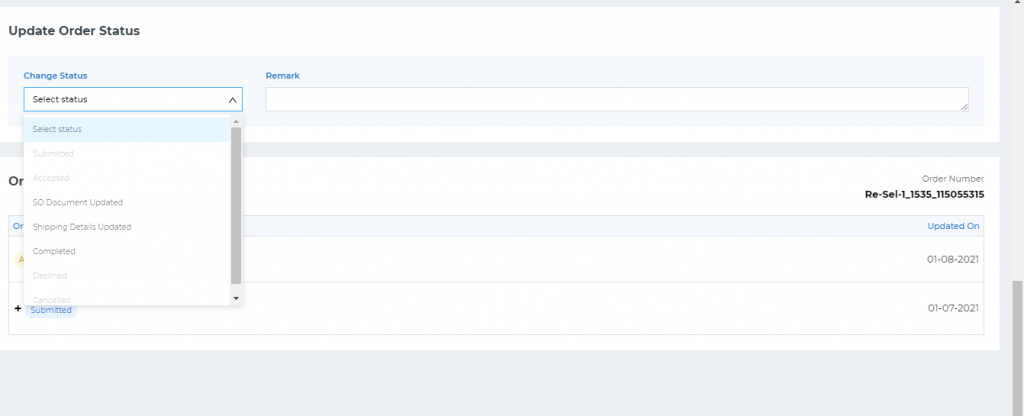
Note: Only the applicable subsequent order status will be enabled and all other statuses will be disabled
and cannot be chosen from the drop-down.
Update the SO Document to proceed further.
Note: If order payment terms is ‘LC’ then only one SO number is generated and if payment terms is
‘Advance’ then multiple SO numbers can be generated. The payment terms is selected by the buyer at
the time of placing the order.
You have to fill in all details and upload the SO document as shown below-
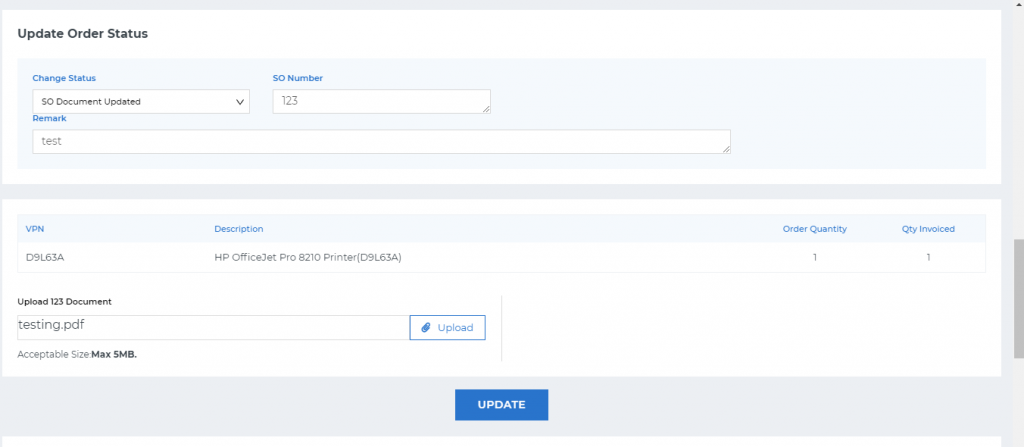
Once you click on ‘Update’, the SO document will be updated.
Now, you have to wait for the buyer to update the payment details in order to proceed further.
Once the buyer has updated the payment details, you can change the order status to ‘Shipping Details
Updated’ by filling all the required information as shown below-
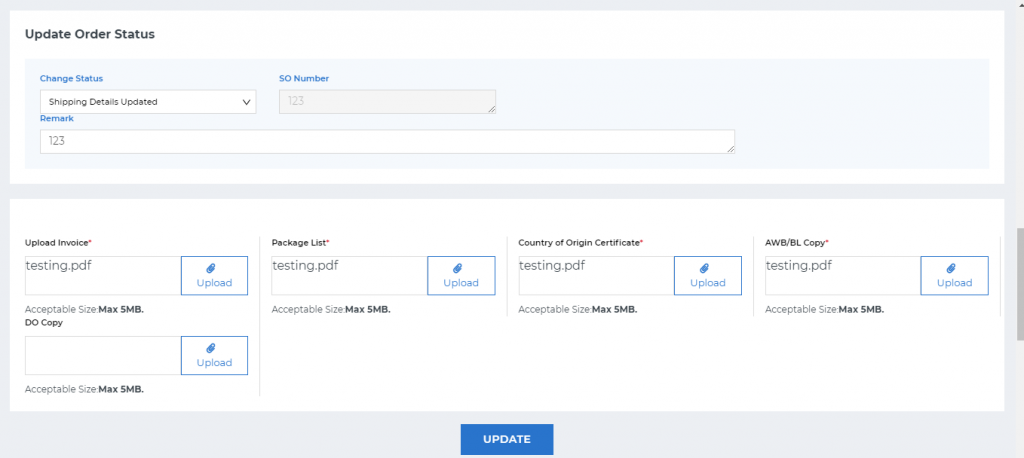
Note: All documents marked with a red asterisk are mandatory to proceed further.
Once you click on ‘Update’, the shipping details will be updated and saved on the portal.
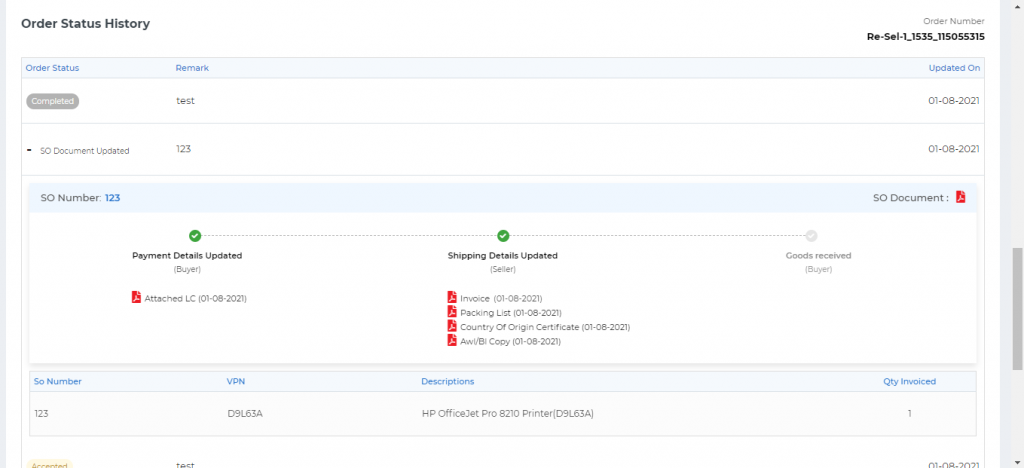
Now you can set the status as ‘Completed’ or wait for the buyer to update the status to ‘Goods received’ as shown below and then mark the order as completed.
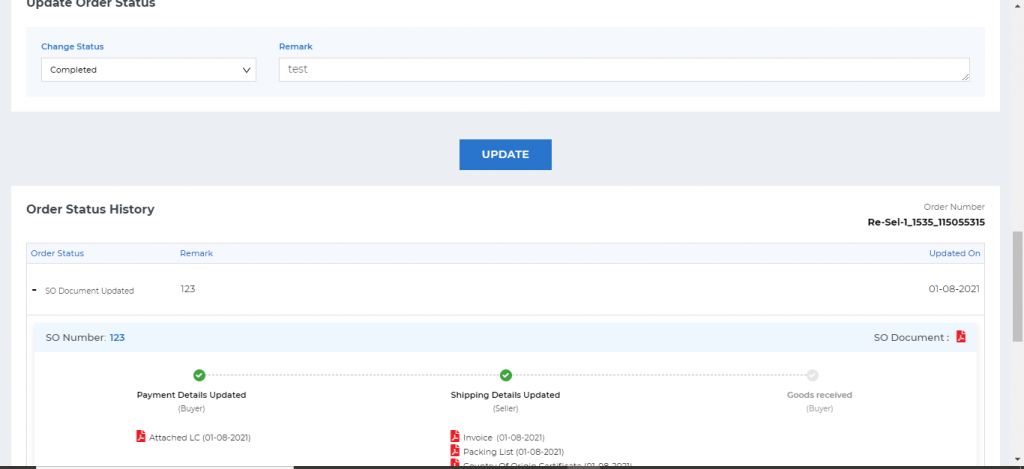
Once status is set to ‘Completed’ it can be viewed under order status history as shown below-
——————————————-End of Document—————————————-